
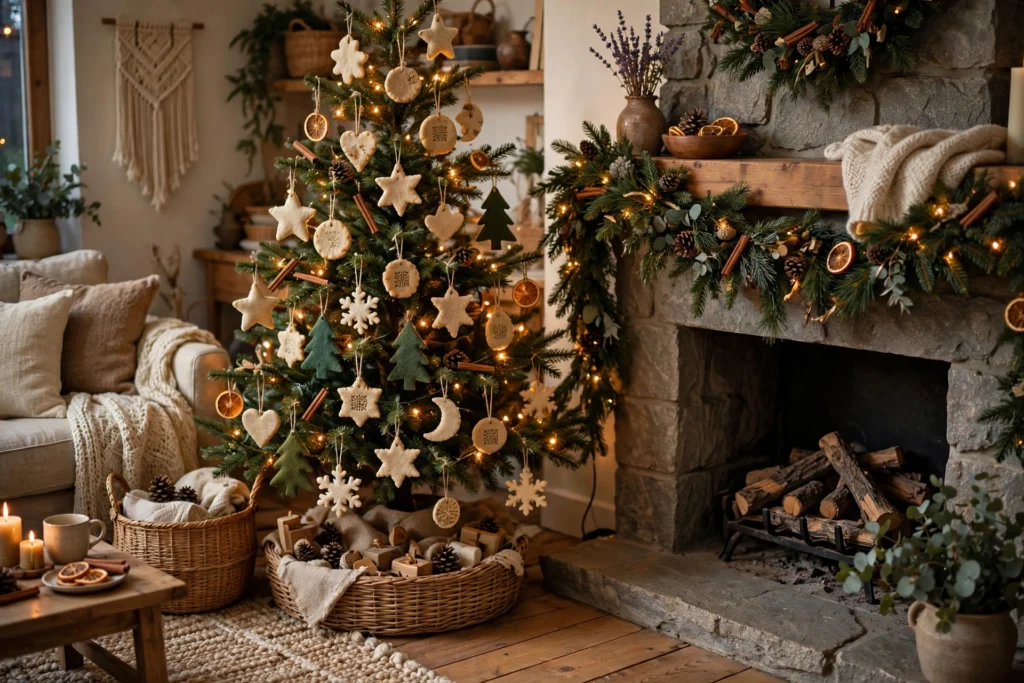
Handmade decor makes Christmas feel personal, and diy christmas decorations let you shape every room with your own hands. You need no fancy tools and no rare supplies. You need a free afternoon, a few basic materials, and a simple plan. This guide gives you real projects you can finish at home, from ornaments and garlands to wreaths and centerpieces.
Start With a Simple Plan

First, pick one room to start in. A single finished corner feels better than five half done projects. Then gather your tools in one box so you can craft without hunting for scissors each time. You will use scissors, glue, twine, ribbon, and a hot glue gun for most projects here. Also, keep a tray under messy work, since paint and glue spread fast on a table. Finally, choose two or three colors for your theme, since too many colors can look busy.
Next, think about who will join you. Kids can paint, sort, and string with ease, while adults can handle hot glue and sharp tools. Split tasks by age and skill. Plan storage as you craft, since a labeled box keeps ornaments safe for next year.
DIY Christmas Decorations for the Tree
The tree is the natural place to start, because handmade ornaments show up close and guests notice them first. Tree projects are small, so you can finish several in one sitting. Start with three easy types, then add more if you enjoy the process. Keep ornaments light, since heavy pieces pull branches down. Finally, hang your best pieces at eye level, where family and guests can see them well.
Salt Dough Ornaments
Salt dough ornaments are a classic first project, and kids love them. You need plain flour, fine salt, water, cookie cutters, a straw, paint, and ribbon. First, mix two cups of flour with one cup of salt. Then add water a little at a time until the dough feels soft but not sticky. Next, roll the dough flat and cut shapes with cookie cutters. After that, poke a small hole near the top of each shape with a straw. Finally, bake the shapes in a low oven until they feel fully hard, then cool, paint, and thread ribbon through each hole.
Salt dough suits stars, trees, and hearts. Press leaves or lace into the dough for texture before baking. Keep shapes fairly thick, since thin pieces can crack as they dry.
Felt Ornaments
Felt ornaments are soft, safe, and quick to make. You need felt sheets, scissors, thread or glue, stuffing, and ribbon. First, cut two matching shapes from felt. Then stitch or glue the edges together, but leave a small gap. Next, push a little stuffing inside for a plump shape. Finally, close the gap, add a ribbon loop for hanging, and add simple details like buttons or stitched lines.
Felt works well for stockings, mittens, and stars. Felt does not fray, so you do not need to finish the edges. This makes it a kind choice for beginners. Felt ornaments are light and safe near lower branches, where small children may reach them.
Pine Cone Ornaments
Pine cones bring a woodland feel to the tree, and they cost nothing if you gather them outside. You need clean dry pine cones, paint, ribbon, and glue. First, brush off dirt and let the cones dry fully indoors. Then paint the tips white for a snowy look, or paint the whole cone in one festive color. Finally, tie ribbon around the top scales to form a loop, and hang the cones where their shape can show.
Pine cones fill gaps between baubles and lights. Group three cones of varied sizes for a fuller look. Keep painted cones away from open flames, since dry natural material can catch fire. Check each cone for bugs before you bring it inside.
Handmade Garlands and Wreaths

Garlands and wreaths shape the whole room, because they draw the eye across walls, doors, and mantels. They use natural material well, so they fit a warm and simple Christmas style. Start with one garland, then make a wreath to match it. Use the same ribbon and the same greens in both pieces, and the room will feel planned rather than random.
Dried Orange Garland
A dried orange garland smells lovely and looks warm against green branches. You need oranges, a sharp knife, baking paper, twine, and a needle with a wide eye. First, slice the oranges thin and even, since thick slices take far longer to dry. Then lay the slices on baking paper and dry them in a low oven, turning them now and then. Next, let the slices cool fully so they feel dry and firm. Finally, thread twine through the top of each slice, space them evenly, and knot the twine so they stay in place.
Mix dried oranges with cinnamon sticks, pine cones, and evergreen sprigs for a richer garland. Dried slices last well in a sealed dry box. For more ideas on using natural elements in your home, see our guide to plant decor. Keep dried garlands away from heat and open flames.
Paper Snowflake Garland
Paper snowflakes are the easiest garland here, and they suit windows, walls, and kids rooms. You need white paper, scissors, and string or thread. First, fold a square of paper in half, then fold it again into a triangle. Then cut small shapes from the folded edges, but do not cut all the way across. Next, open the paper with care to reveal the snowflake. Finally, repeat the steps to build a set of varied flakes, and thread them onto string with even gaps.
No two snowflakes need to look alike, and that variety is part of the charm. Layer two flakes of varied sizes for a fuller look. Try white paper first, then pale blue or soft gold for a warmer room. Paper flakes store flat in an envelope for next year.
Evergreen Wreath You Make Yourself
A wreath you make yourself feels far more special than a plain store wreath. You need a wreath base, evergreen branches, floral wire, ribbon, pine cones, and scissors. First, cut the branches into short lengths of about the same size. Then lay them in one direction around the base, with each layer covering the stems below it. Next, wrap floral wire around each bundle to hold it firm. Finally, add pine cones and dried oranges as accents, tie a ribbon bow at the bottom, and add a loop for hanging.
Work slowly around the circle, and step back now and then to check the shape. Fill thin spots with extra sprigs before you add the bow. For more handmade seasonal ideas with a similar warm feel, see our decorating tips for fall. Hang the wreath on a hook that suits its weight.
DIY Christmas Decorations for the Table and Mantel

The table and the mantel carry the mood at meals and in the evening, so handmade pieces here matter a lot. Keep the center low on the table, since guests need to see each other across it. On the mantel, build from the center outward, and keep the tallest pieces at the ends. Leave space for candles in safe holders, and never crowd flames near greens.
Evergreen Table Centerpiece
An evergreen centerpiece is simple, fresh, and easy to change each year. You need a shallow tray or board, evergreen branches, pine cones, dried oranges, and flameless candles. First, lay the branches across the tray so they fan out in each direction. Then tuck pine cones and dried oranges into the gaps. Next, place flameless candles in the center, where their glow can show. Finally, add a ribbon under the tray for color, and check the shape from each seat at the table.
Flameless candles are a smart choice here, since real flames and dry greens do not mix well. Swap the oranges for small baubles if you want more color. Keep the centerpiece low and stable, so it does not block talk or tip over.
Handmade Mantel Garland
A mantel garland frames the fireplace and sets the tone for the living room. You need evergreen branches, twine or wire, ribbon, pine cones, and small ornaments. First, lay out branches in a long line on the floor, with tips pointing the same way. Then bind them together with twine at even points along the line. Next, add pine cones and ornaments at varied points, but do not overload one side. Finally, drape the garland across the mantel, fix it with hooks or clips, and add ribbon loops at each end.
Let the garland drape a little in the center, since a slight curve looks natural. Keep greens clear of the firebox opening, and never hang decor where heat can reach it. Check hooks each week, since heavy garlands can slip.
Projects for Every Room

Give each room one handmade touch. Small projects work best in small rooms, since they add cheer without clutter. Keep the color theme the same across the home.
In the entry, keep it simple and welcoming. Hang your handmade wreath on the door, and add a small garland along a console table. Add paper snowflakes to a mirror or window, since they catch light well. For quick styling wins between bigger projects, see our quick touches. Keep the floor clear for coats and shoes.
In the bedroom, choose soft colors and small pieces. Hang paper snowflakes on the window, and place a flameless light on the dresser. Use the same ribbon color as the living room. In the kitchen, tie cinnamon sticks with twine on cabinet knobs for scent and color. In the bathroom, a small wreath and a jar light are enough. Keep decor away from taps and wet zones.
Project Planner: Pick Your Weekend Plan
Use this planner to match each project to your time and skill level. Start with an easy project if you are new to crafting. Then move to a medium project once you feel sure of your tools. Make dried oranges a day ahead, since they need drying time.
| Project | Main materials | Time needed | Skill level |
|---|---|---|---|
| Salt dough ornaments | Flour, salt, water, paint, ribbon | About 2 hours plus drying | Easy |
| Felt ornaments | Felt, thread or glue, stuffing, ribbon | About 1 hour for a set | Easy |
| Pine cone ornaments | Pine cones, paint, ribbon, glue | Under 1 hour | Easy |
| Dried orange garland | Oranges, twine, needle | About 2 hours plus drying | Easy |
| Paper snowflake garland | Paper, scissors, string | Under 1 hour | Easy |
| Evergreen wreath | Wreath base, branches, wire, ribbon | About 2 hours | Medium |
| Table centerpiece | Tray, branches, cones, flameless candles | Under 1 hour | Easy |
| Mantel garland | Branches, twine, cones, ribbon | About 1 to 2 hours | Medium |
Make It Last and Stay Safe

Handmade decor lasts longer when you store it with care. Wrap fragile ornaments in paper and store them in a firm box. Label each box by room, so next year starts fast. Keep dried oranges and paper flakes dry, since damp storage can spoil them.
Safety matters as much as beauty, so keep a few rules in mind. Keep handmade decor away from open flames, heaters, and hot bulbs. Check light strands for worn cords or loose bulbs before you hang them, and replace any damaged strand. Turn lights off before bed and before you leave home. For clear safety steps on trees, lights, and candles, see this holiday fire safety guide. Keep small parts away from young children and pets, since beads and buttons can pose a choking risk.
For more outdoor handmade ideas, see these DIY porch decorations, and use weather safe materials outside.
Frequently Asked Questions
How long do handmade Christmas ornaments last?
Handmade ornaments can last for many years when you store them with care. Salt dough and felt pieces keep well in a dry box, wrapped in paper. Check ribbon and glue each year, and repair small damage at once. Keep them away from damp rooms, since moisture can weaken paint and dough.
What are the easiest projects for beginners?
Paper snowflakes, felt ornaments, and pine cone ornaments are the easiest places to start. Each one needs only basic tools, and you can finish a set in under an hour. Mistakes still look charming, since handmade pieces do not need to look perfect. Start with one project, then try a garland once you feel sure.
Can kids help make these projects safely?
Yes, kids can help a lot when tasks match their age and skill. They can paint, cut paper, sort pine cones, and string garlands with ease. Adults should handle hot glue guns, sharp knives, and the oven. Keep small beads and buttons away from very young children, since they can pose a choking risk.
How do I keep dried orange slices from going soft?
Dry the slices fully in a low oven, and let them cool before you store or hang them. Store spare slices in a sealed box in a dry place, not in a damp room. Bring garlands indoors during wet weather, since damp air can soften dried fruit fast and spoil the look.
What should I do if my wreath looks thin?
Add more branches in the thin spots, and work in one direction around the base. Layer shorter sprigs over gaps, and step back often to check the shape. Add pine cones or dried oranges as accents, since they fill gaps and draw the eye across the wreath.
How can I make handmade decor look neat rather than messy?
Pick two or three colors, and repeat them across rooms for a calm and planned feel. Group pieces in odd numbers, and leave empty space around each display. Step back and check each display from the doorway, since that view shows clutter that close work can hide.
Conclusion
Handmade projects bring warmth that store decor cannot match, because each piece holds time and care. Start with one easy project, then build your set year by year. Soon your home will carry a style that feels truly yours, and each Christmas will bring back pieces full of happy memories.